Were you aware that window tint can block as much as 99% of harmful UV rays, safeguarding both the interior of your car and your skin? However, as time passes, car window tint can degrade, leading to bubbling, discoloration, or even legal issues. Whether you’re dealing with tint residue or just want a fresh look, removing automotive tinting can significantly improve your car’s appearance.
Although DIY removal may seem easy, it’s crucial to follow the correct procedure to prevent harming your car’s glass. In this guide, StageTwo Labs will show you how to remove tint from car windows safely and efficiently, whether you opt for a DIY tint removal or decide to call in the professionals.
Why Should You Remove Your Car Window Tint?
Over time, your window tint can degrade, leading to issues like bubbling or fading. Tint film doesn’t last forever. UV protection, heat reduction, and privacy are great benefits when the tint is fresh, but eventually, wear and tear take a toll on your car’s windows.
Additionally, tint darkness laws vary across regions. Laws are updated often, and what was once legal can now be too dark. If your car windows no longer meet legal compliance, it’s time to remove the tint to avoid fines. Some vehicle owners may also choose to remove car tint for aesthetic preferences or before a vehicle sale to increase appeal.
How to Prepare for the Window Tint Removal Process?
Before you begin the tint removal process, it’s important to prepare both yourself and your workspace.
Essential Tools Checklist
- Heat gun or hairdryer: Used to loosen the adhesive.
- Razor blade or scraper blade: For peeling off the tint film.
- Ammonia solution or soapy water: To help dissolve the adhesive.
- Microfiber cloth: For cleaning the glass surface.
- Protective gloves: To protect your hands.
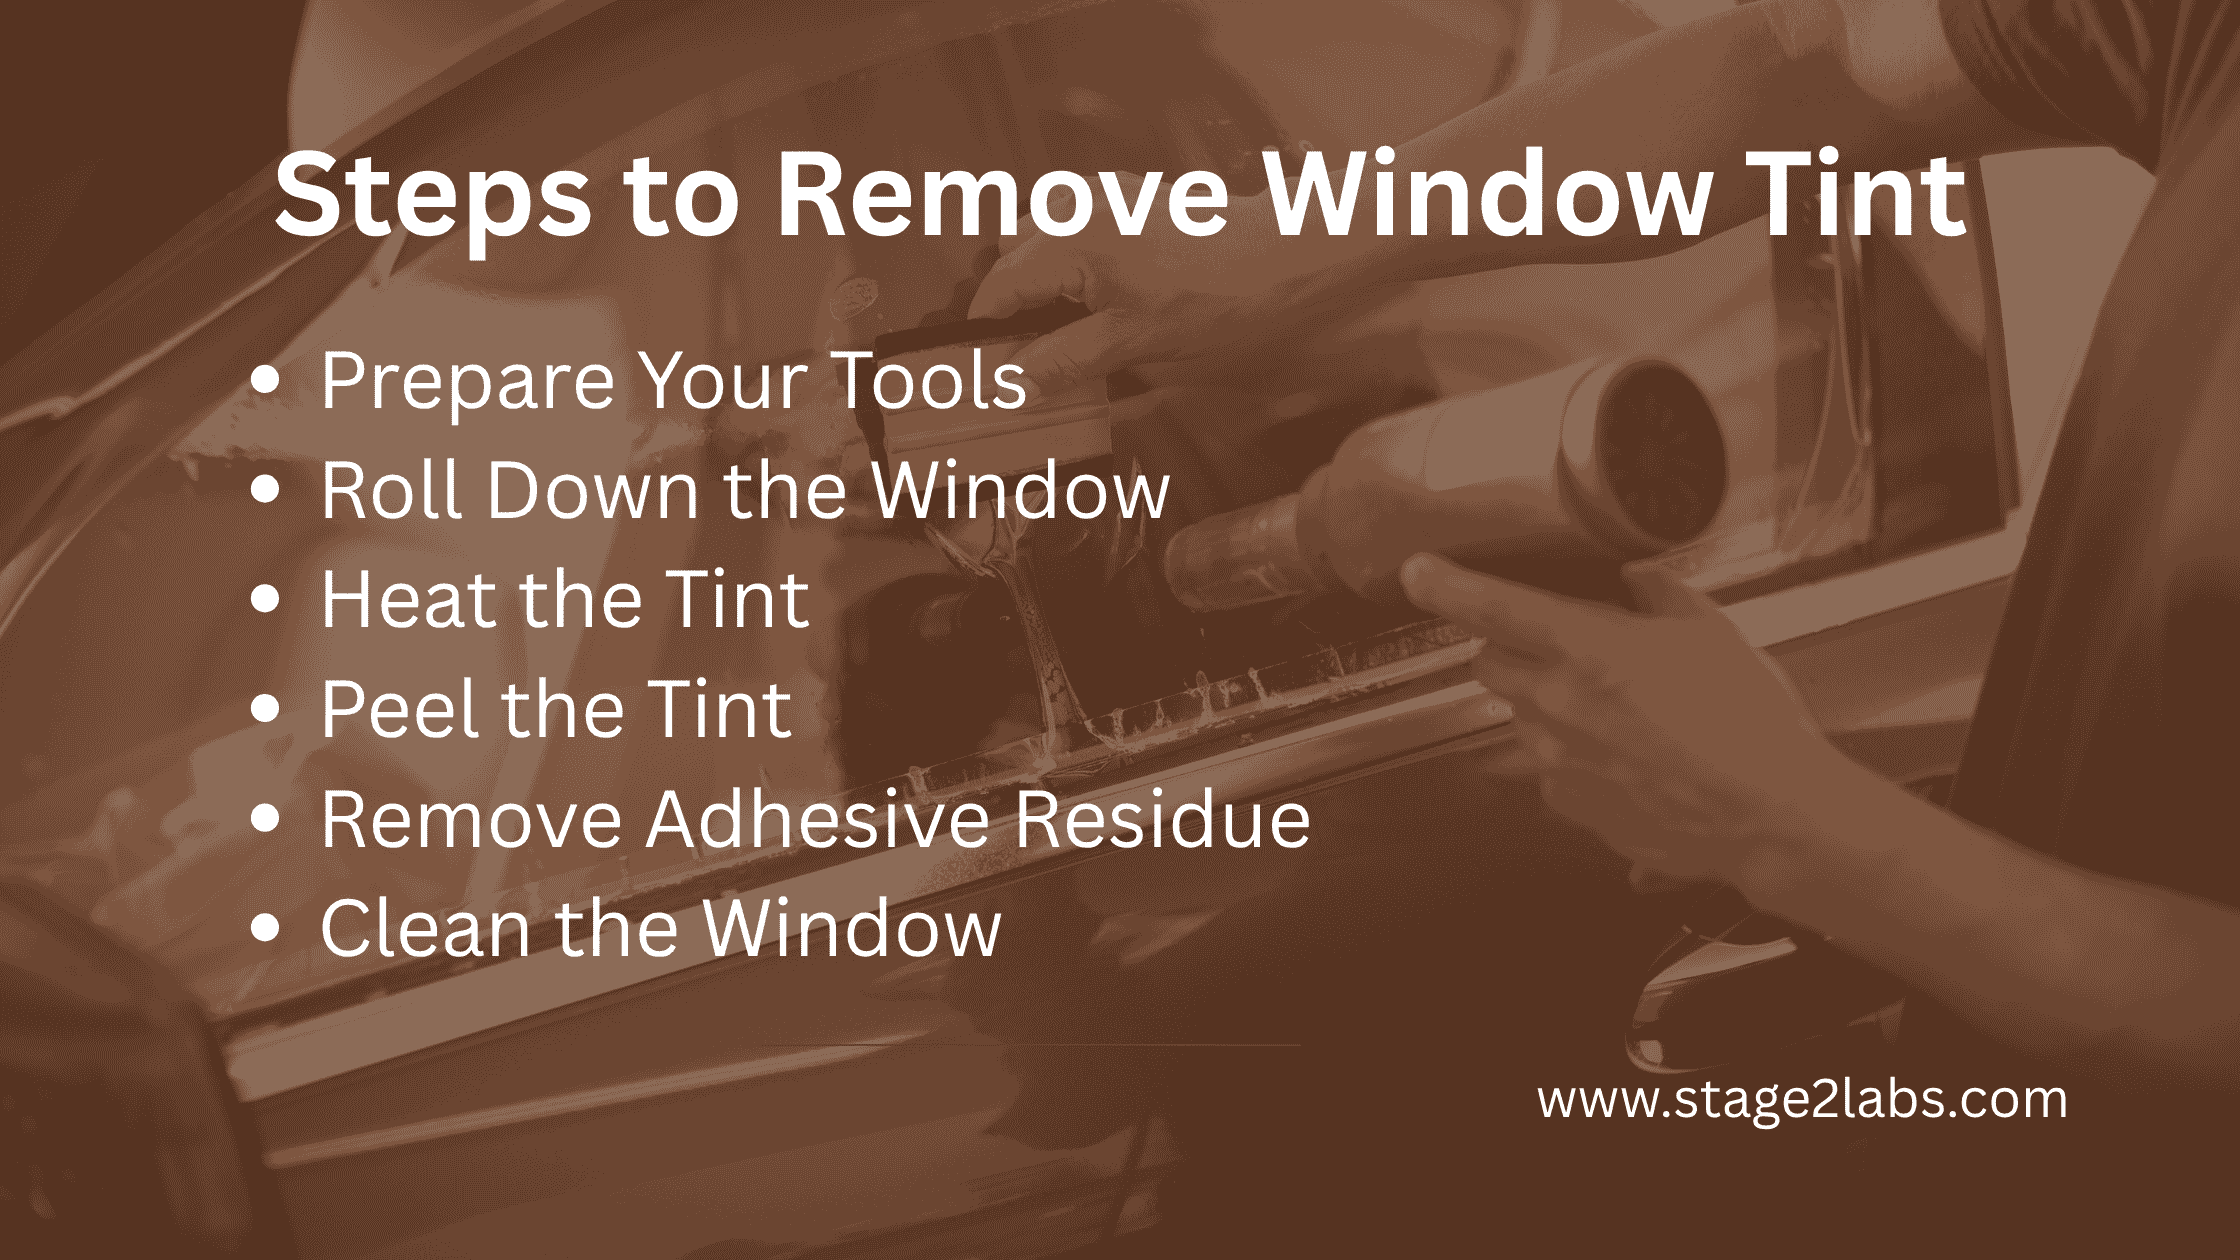
DIY Window Tint Removal: Step-by-Step Process
Here’s the step-by-step guide on how to remove tint yourself.
Step 1 – Roll Down the Window
To make the process easier, roll down the window a few inches. This gives you access to the tint film’s edges, making it simpler to peel off. Starting from the edges will also prevent any glass damage during the removal.
Step 2 – Heat the Tint
Heating the tint is crucial to softening the adhesive, making the peeling film easier. Heat the tint using with heat gun or hairdryer on a low setting. Make sure to keep a safe distance to avoid overheating the glass surface.
Tip: Hold the heat tool around 3-4 inches from the tint film for a few minutes until it feels warm to the touch.
Step 3 – Peel the Tint
Once the adhesive has softened, gently lift the corner of the film with a razor or scraper. Peel the film off slowly and in a steady motion. Continue applying heat to any areas where the adhesive is still strong.
Important: Be patient and avoid pulling too fast. Ripping the tint film can leave behind tough tint residue.
Step 4 – Remove the Adhesive Residue
After removing the tint film, you’ll likely have some stubborn adhesive residue left on the glass. Use an ammonia solution or soapy water to dissolve the glue. Apply the solution, let it sit for a few minutes, and then scrape it off with a plastic scraper.
Step 5 – Clean the Window
Once all the adhesive is gone, thoroughly clean the car window using a microfiber cloth and window cleaner. This will remove any leftover tint residue and restore the clarity of your automotive glass.
Alternative DIY Methods for Removing Window Tint
If the heat and peel method isn’t for you, try one of these alternative methods for removing car tint.
Ammonia and Sunlight Method
This method uses sunlight exposure and ammonia solution to loosen the adhesive. Park your car in direct sunlight and spray the tint film with ammonia. Cover the area with plastic wrap or trash bags to keep the ammonia in place. After an hour, peel the tint film off.
Steam Method
If you have a steamer, this method is effective for softening the adhesive. Simply direct the steam at the tint film and scrape the adhesive off as it softens. This method is less harsh on the glass surface and is good for those worried about glass damage.
Razor Blade Method
If the tint film is difficult to peel off, use a razor blade to gently scrape off the adhesive. Be careful not to scratch the glass surface. This method requires patience and should be done slowly to avoid glass damage.
Heat Gun / Hair Dryer Method
Use a blow dryer or heat tool (heat gun) on the tint film to loosen the adhesive. Once the tint softens, peel it off. This method is similar to the heat and peel method, but can be more effective in certain cases.
What Are the Mistakes to Avoid During Window Tint Removal?
We’d like to share some common mistakes that vehicle owners often make when removing car tint:
- Using the wrong tools: Always use a plastic scraper or razor blade carefully.
- Not heating the tint properly: Heating the adhesive makes it easier to remove the tint.
- Rushing the process: Take your time to avoid damaging the glass surface or leaving behind tint residue.
Tips for Replacing Your Window Tint
Having worked with thousands of clients over the years, we’ve gained invaluable experience in helping people replace their window tints. Here are some pro tips we’ve learned along the way to ensure your new tint is applied perfectly:
- Choose the Right Tint Film: Not all tint films are created equal. For long-lasting results, we recommend ceramic or carbon films that provide better UV protection and heat reduction.
- Well-Ventilated Area: Make sure to work in a well-ventilated area to avoid exposure to chemicals. A shade or garage is perfect for a DIY tint removal project. It’s also best to roll down your window before starting to make the process easier.
- Professional Installation Matters: Even with high-quality tint, improper installation can lead to bubbling or peeling. At StageTwo Labs, our team of experts ensures a smooth, bubble-free finish every time.
- Maintain Your Tint: After installation, avoid rolling down your windows for at least 48 hours. This allows the tint to properly bond to the glass surface.
- Understand the Legal Limits: Windshield tint is often subject to tinting laws. In the USA, tint is subject to strict regulations, with each state having its own tint darkness laws. Generally, the top 6 inches of your windshield may have a darker tint (known as the eyebrow strip), but the rest of the windshield must allow for a certain amount of visible light transmission (VLT).
Here’s a quick breakdown:
State | Front Side Windows | Back Side Windows | Rear Windows | Windshield | Reflectivity | Other Restrictions |
California | 70% VLT | Any | Any | 4 inches (non-reflective) | No more reflective than a standard window | Red, amber, and blue tints not allowed. Dual side mirrors required for back tinted windows. |
Florida | 28% VLT | 15% VLT | 15% VLT | Non-reflective tint above the AS-1 line | No more than 25% reflective | Dual side mirrors required for back tinted windows. |
Texas | 25% VLT | 25% VLT | Any | 5 inches or AS-1 line | No more than 25% reflective | Red, amber, and blue not allowed. Dual side mirrors required for back tinted windows. |
New York | 70% VLT | 70% VLT | Any | 6 inches | No metallic or mirrored tinting | Dual side mirrors required for back tinted windows. |
Reference: tintwiz.com
Please ensure to verify the latest regulations with local authorities or certified professionals, as tint laws can be subject to change.
Professional Tint Removal: When Should You Choose a Pro?
If tackling DIY tint removal feels daunting or you’re concerned about potential glass damage, it’s time to reach out to StageTwo Labs for professional assistance. As certified window tint installers, we have the right tools and expertise to ensure your tint is removed seamlessly, without any lingering tint residue or risk of damaging your car.
Benefits of Choosing StageTwo Labs for Tint Removal:
- We use expert tools and advanced techniques to guarantee flawless removal.
- Our team ensures safe removal without harming your glass or defroster lines.
- Faster and more efficient than attempting it yourself, saving you time and effort.
At StageTwo Labs, we make the tint removal process hassle-free and reliable.
Conclusion
In conclusion, how to remove tint from car windows can be straightforward with the correct techniques and instruments. Whether you opt for a DIY tint removal or professional help, following proper steps ensures a clean, damage-free result. Always consider legal compliance and maintenance when reapplying your tint for optimal performance and appearance.
If you’re in Roseville, CA, and need expert help, StageTwo Labs offers professional window tint removal services. We provide high-quality tint installation services and ensure your car gets the best care possible.
Contact StageTwo Labs
Client's Reviews
FAQs
What’s the best method to remove tint from car windows?
The easiest way to remove tint is by using the heat and peel method, which involves heating with a heat gun or hairdryer to soften the adhesive, making the tint easier to peel off.
Which is more effective for removing tint: a heat gun or a steamer?
Both tools are effective, but a heat gun provides more direct heat and control, making it generally more efficient for loosening the adhesive and peeling off the tint.
Is window tint easily removable?
Window tint can be removed with the right technique, but it can be time-taking and demands patience to avoid glass damage and ensure proper adhesive removal.
Does WD-40 remove tint glue?
Yes, WD-40 can help dissolve tint glue, but it’s better to use specialized adhesive removers for a cleaner finish and to avoid any potential damage to the glass surface.
What chemical dissolves window tint?
Ammonia and isopropyl alcohol are commonly used to dissolve the adhesive that holds the tint in place, making it easier to peel off the tint film.